


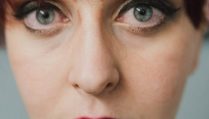

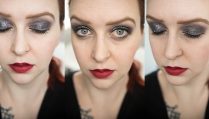


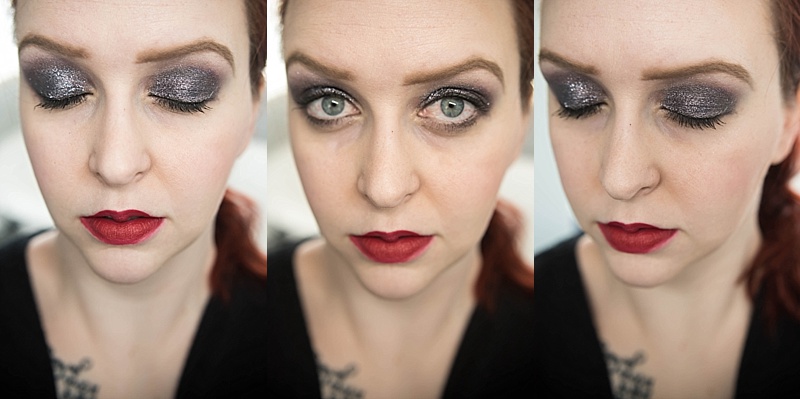
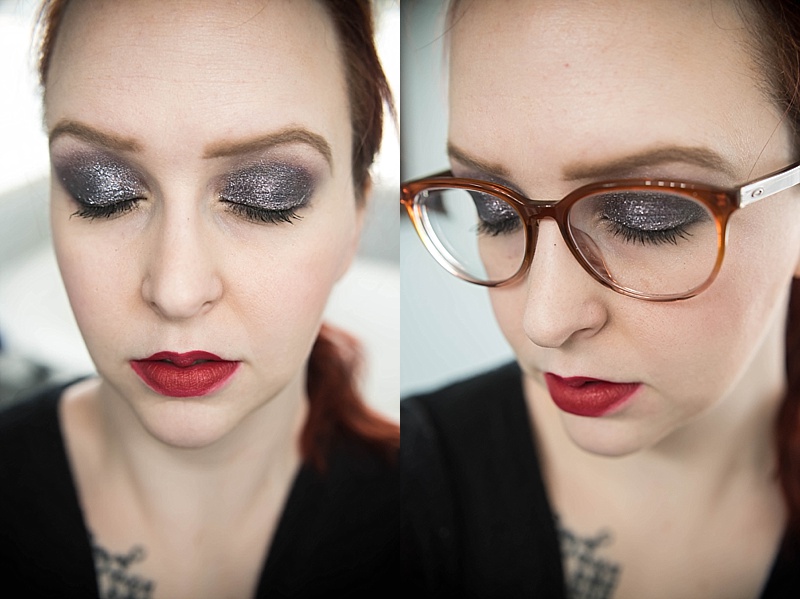
A smokey eye is something I’ve always been intimidated by, but that I finally decided that I wanted to conquer. I chose to have a purple hue to mine, as with how pasty I am I feel that just black and grey is a bit too drastic for my skin tone, and isn’t as flattering. This look is surprisingly easy to do, while looking super fancy.
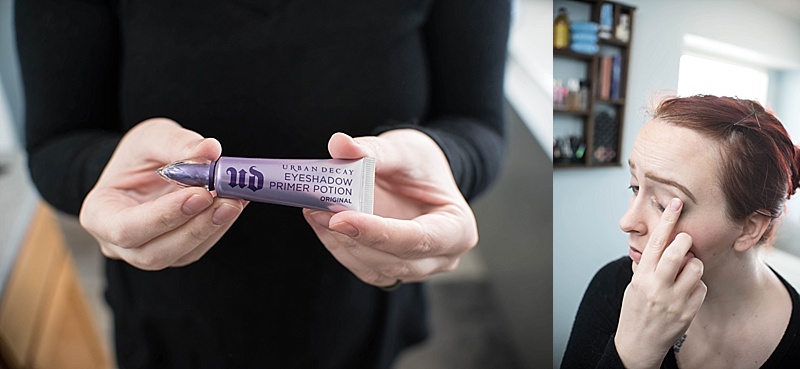
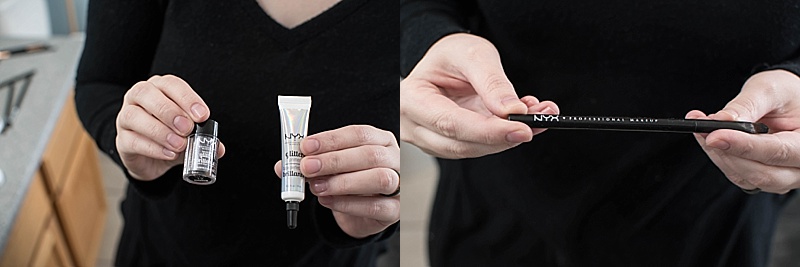
You want to start with your eyeshadow primer. I use this one. I use the applicator and dab a little on each eye, then I use my finger to spread it out and smooth it in. Be sure to let it dry or your eyeshadow will not blend. I like to put a little bit of my powder over the top just to help it set.
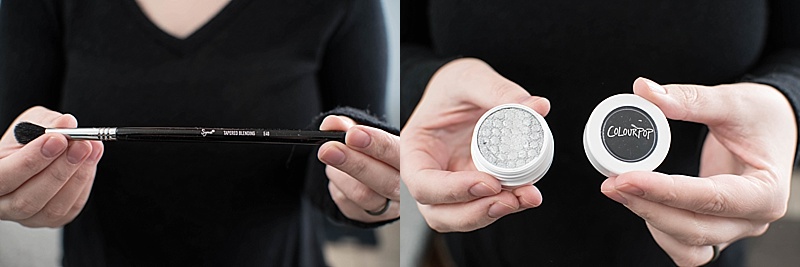
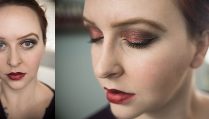
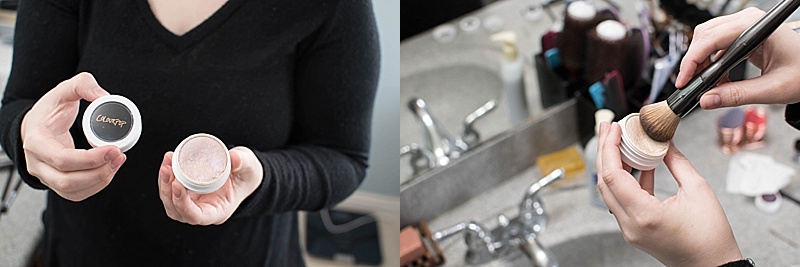
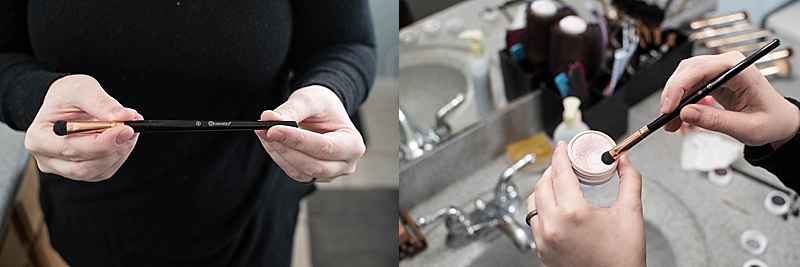
Now, you want to grab a blending brush, I use a tapered blending brush by Sigma. Then, you need your base color – I used That Girl by Colourpop, which has been discontinued. You could use Liberty instead, and that would work just as well.
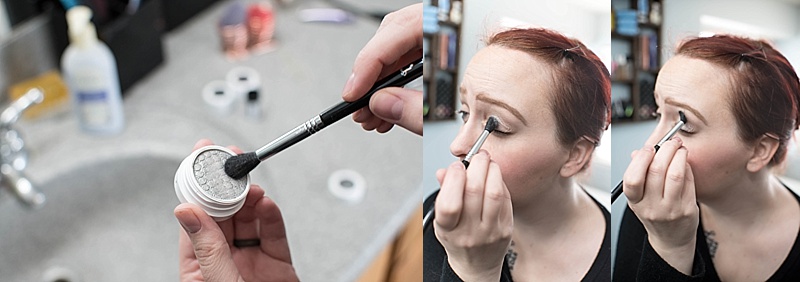
Apply it to your eyelid, going up to your crease, and blend well.
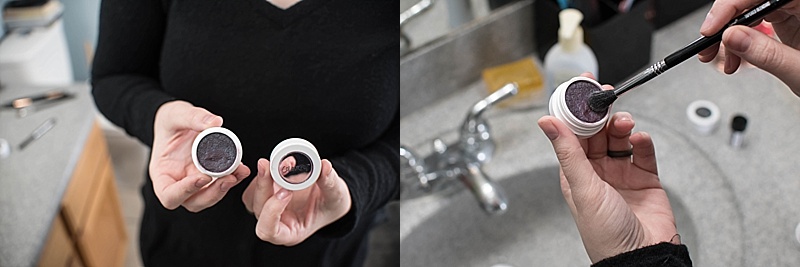
Next, grab your medium shade contrast color. I used Roller Girl by Colourpop, but you could use Envy and get a very close match. 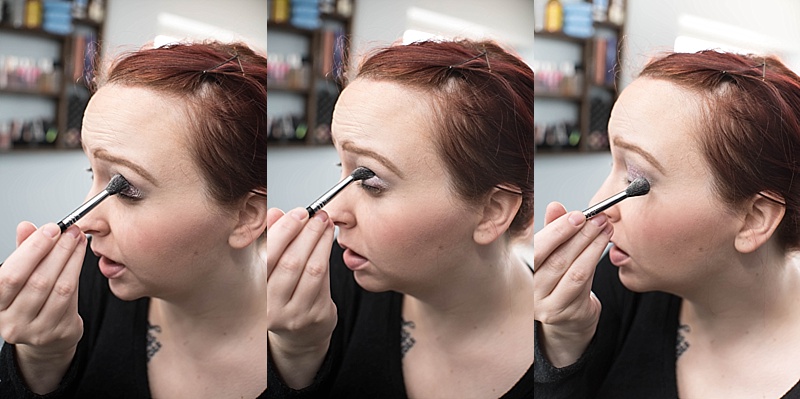
You want to start at the outer corner of your eye, and blend in and up toward your crease and over your eyelid. Be sure to blend well.
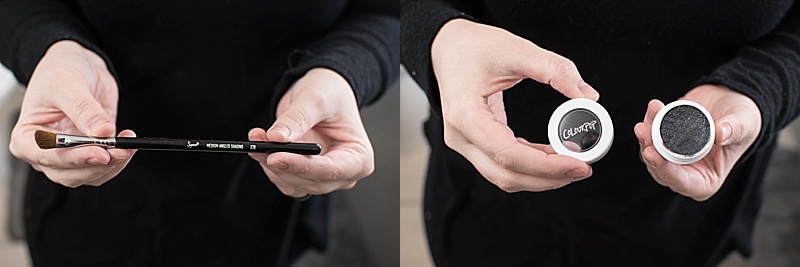
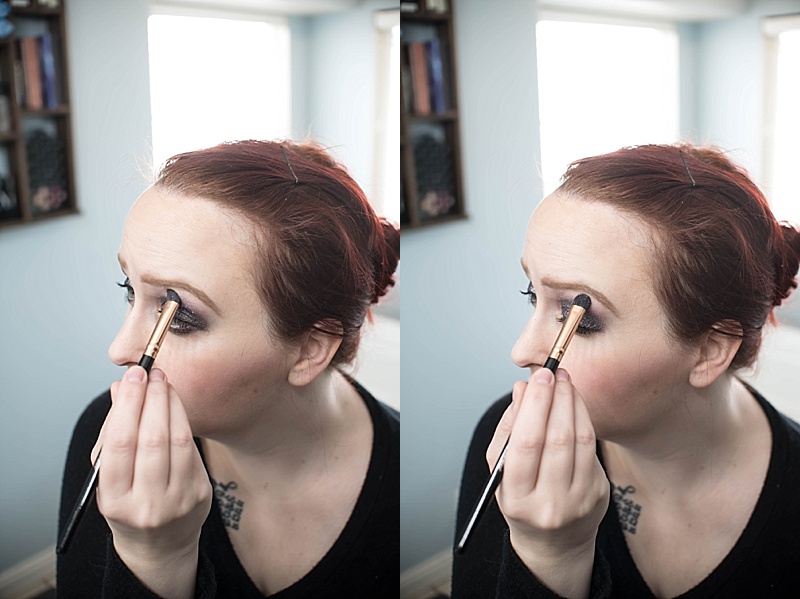
Now, you want your darkest contrast color, Friskie, by Colourpop, along with your angled blending brush

You want to work from the outer corner of your eye, and blend in and into the crease. You want to be careful to not go too far up, you want to leave a space between your eyebrows and your eyeshadow.
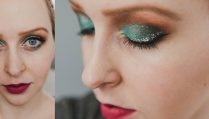
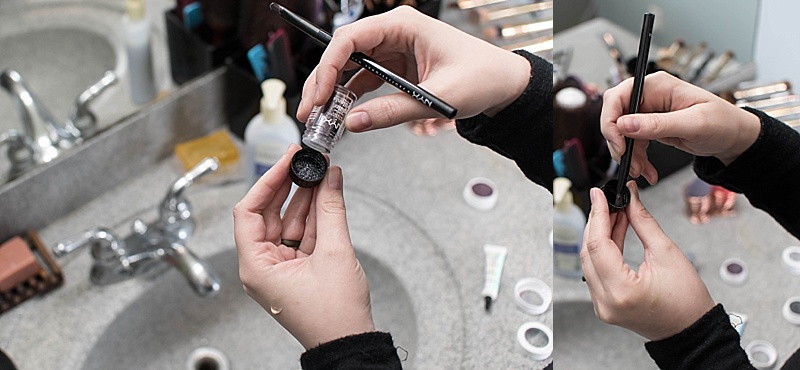
Now you want to grab your gunmetal glitter, glitter primer, and brush that you use for glitter.
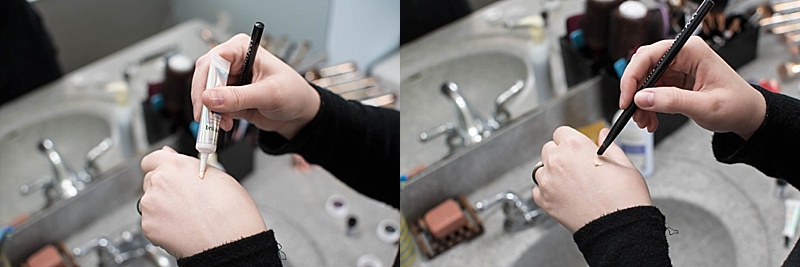
I put some of the glitter primer on my hand, then I dip my brush into the primer.
After that I shake some glitter into the cap, and using my brush that has the primer on it I apply the glitter to my eye.
I apply it to the eyelid only, re-dipping into the primer and glitter as needed. You can do a light coat of glitter, or full, depending on what you prefer.
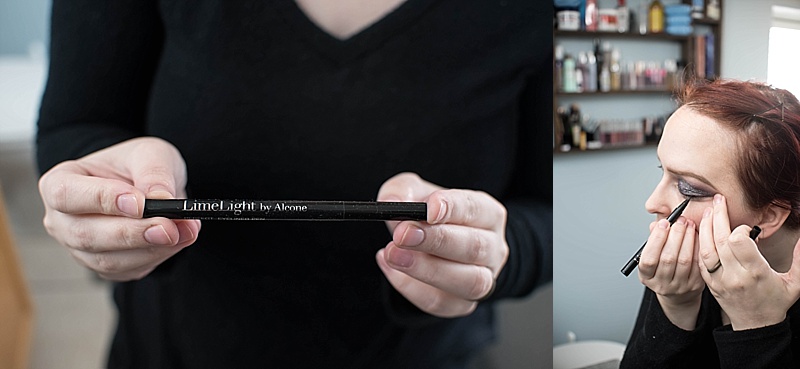
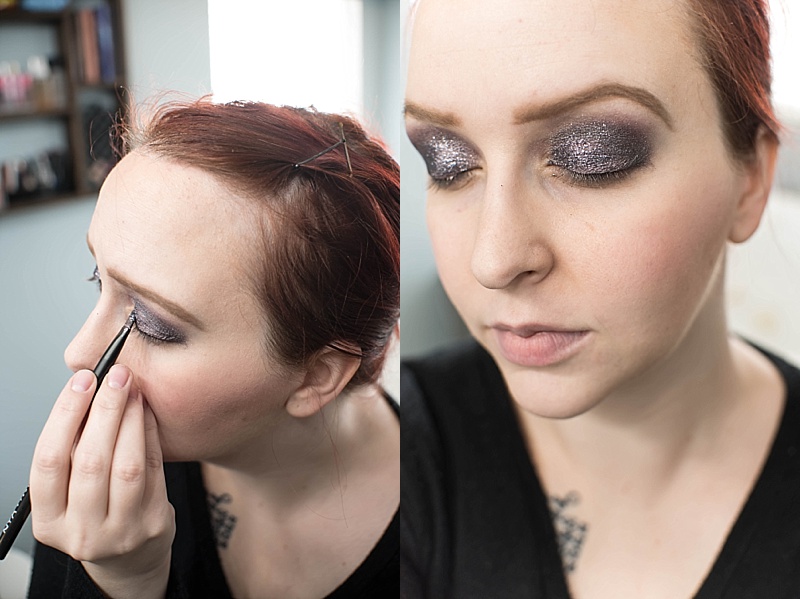
Then, I take my eyeliner and I begin applying it to my eye. I start at the inner corner, and work my way out. I didn’t do a wing with this look, but you definitely could, just extend your liner out further.
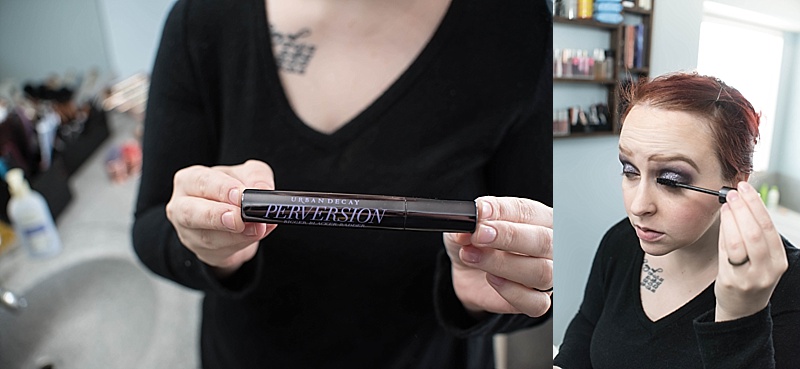
Then, it’s time for the mascara. Apply as you normally would, and clean up any fall out or spots as needed using a q-tip.
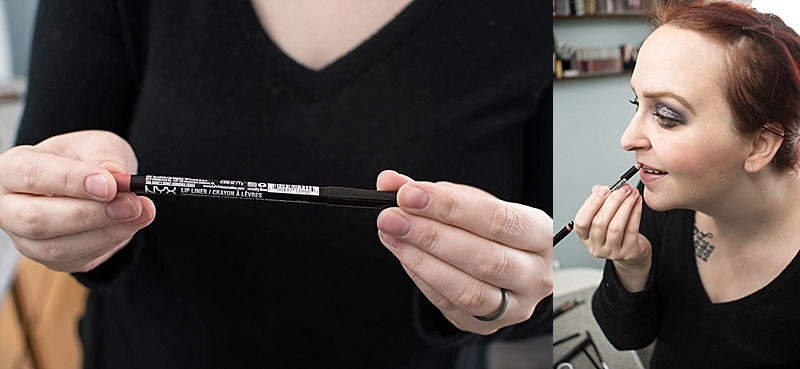
I liked bold lips with this look, so I used a nude shade of lipliner from NYX and lined my lips.

Then, it’s time to apply your lipstick. I used Redrum by Jeffree Star. I start by almost lining my lips with my lipstick, going over the edges, then I fill them in.
Next, grab your highlighter. I used Spoon by Colourpop. Grab a blending brush and apply it to the top of your cheekbones.

This adds a bit of a shimmer when the light hits your face just right, and is absolutely gorgeous.
Now, you want to grab another small blending brush, and using your highlight again you are going to apply it under your eyebrow.
Start at the inner corner and work your way out, blending as you go. This helps separate your eyeshadow from your eyebrow, and adds that gorgeous glimmer.
I like to spray my face with some setting spray at this point just to seal it all in. You’re done! Enjoy being dolled up, whether it’s just for you, or for a fun night out.
Comments